Just a little note: at the moment, I'M ONLY posting orders within the UK. Thanks so much for understanding.
Five Essential Linocut Tools Every Printmaking Beginner Needs
New to linocut printmaking? Discover the 5 essential tools every beginner needs to get started, from carving tools to brayers and ink. Expert tips for linocut beginners from Essex artist printmaker Natasha Davis.
Natasha Davis
2/15/20263 min read
This post contains affiliate links. If you purchase through my links I may earn a small commission at no extra cost to you. I only recommend products I genuinely use and love.
Starting out in linocut relief printmaking doesn't mean you need to dive into your savings (that comes later, once you’re fully obsessed!). While there are countless shiny new tools you could buy, here are the five essentials that will actually get you started on your printing journey. A small, scrappy setup will still create magic.
Once you have these basics mastered, you might like to browse my original linocut prints to see what's possible!
1. Linocut Carving Tools
A basic set of lino cutters is your entry point into printmaking. Lots of beginners start with sets that have interchangeable blades; however, I'd recommend starting with a basic Japanese relief cutting tool set instead. This is the set I introduce students to during my workshops. I prefer these because they can be honed and sharpened, whereas entry-level interchangeable blades tend to be duller and so more prone to slipping and stabbing. Plus, once you've mastered linocut, this tool set will allow you move into woodcut, too.
Whatever you choose, just remember: always carve away from yourself, and keep those sterile strips handy while you're learning linocut!
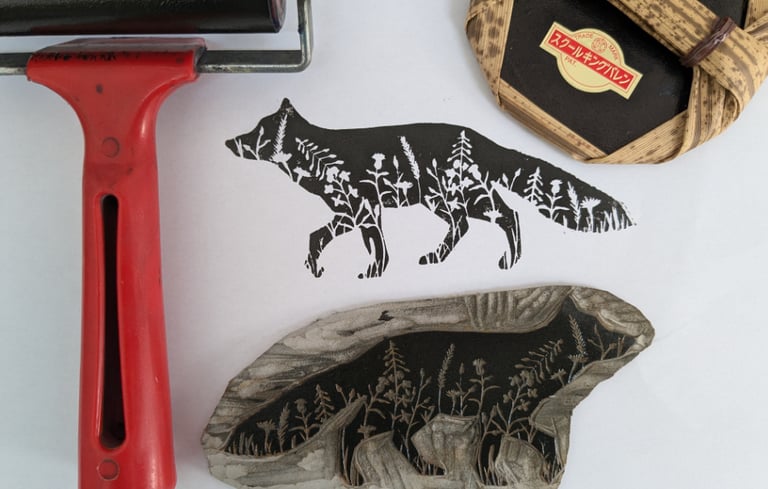
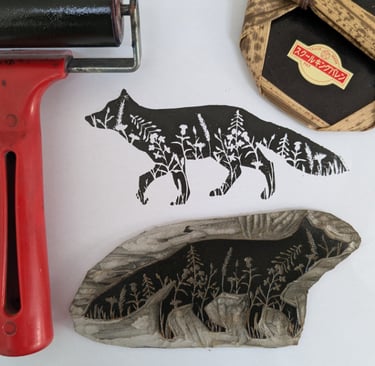
2. A Brayer (Roller)
This is how you'll apply ink evenly to your lino block or plate. When I first started, I didn't have a brayer so I tried applying the ink with a jam jar… It didn't work so you've no need to try it! Besides, a 4-inch soft rubber brayer is perfect for beginners and you can easily find ones for less than a tenner. I recommend a 4-inch because they're wide enough to cover areas quickly but manoeuvrable enough for smaller linocut prints. Hard rubber brayers will certainly work too, but soft rubber is more forgiving and gives better coverage, especially if you're like me and appreciate all the chatter* in a block.
My preferred brayer for beginners is the Speedball pop-in from Jackson's Art which you can find here. I love using these at my workshops as they're so easy to keep clean! No more gunky ink buildup!
*Chatter = the ink pickup in carved-out areas
3. Printing Ink
Water-based relief ink is beginner-friendly and easy to clean up. Start with black; it's classic! You can always add colours later. A small tube will last you dozens of linocut prints. If you do want to jump straight into using oil-based inks, I highly recommend Cranfield's Caligo Safe Wash range as they're highly pigmented and clean up with hot, soapy water.
4. A Baren or Wooden Spoon
You don't need a press. I was five years into my printmaking journey before I bought a press (an A3 Pooki Press which works wonderfully) yet I still prefer hand-printing my linocuts. Maybe it's something to do with feeling connected to the effort? You may not need a press but you do need something to transfer ink from your lino block to paper. Traditional Japanese barens are beautiful and effective but I will always recommend, first and foremost, (drum roll, please) the humble wooden spoon from your kitchen. I love how the back of a large spoon gives you good control to change the pressure and get into all the nooks and crannies of your block. Sometimes I will go over a cleared area with a bit more pressure from the edge of the spoon so I can bring out even more chatter!
5. Lino (linoleum block or a lino alternative)
Obviously, you need something to carve. My first choice will always be traditional grey hessian-backed lino as it's completely biodegradable. There are other non-biodegradable types out there which are softer or easier to carve or cheaper. You can buy lino in a variety of different sizes and in single sheets or in packs of 10. For a linocut beginner, I'd recommend buying a block no larger than 5x7 inches so the process doesn't become overwhelming.
Bonus mention: Good paper matters, especially if you plan on selling and/or exhibiting your linocut prints, but when you're starting out, any smooth paper will work for practise, especially if you are hand-printing; heavier papers (over 100gsm) will give you quite the arm workout! Copier paper is what I use during my workshops as it's smooth and lightweight so perfect for hand-printing. Save the fancy archival relief printmaking paper for when you're ready to make editions.
The beauty of relief printmaking is that you can start simple and build your toolkit as you discover what you love. These five linocut tools will get you started so you can carve, ink, print and repeat to your heart's content!
Want to try linocut printmaking yourself?
If this post has inspired you to pick up a carving tool, I'd love to have you join one of my linocut printmaking workshops in Essex! Perfect for complete beginners and no art experience necessary! All materials are provided and you'll take home your own hand-pulled prints.
Natasha Davis Art
Linocut prints and workshops, Essex, UK.
contact natasha:
hello@natashadavisart.co.uk
+44 7379 985 479
© 2026. All rights reserved.